> ## Documentation Index
> Fetch the complete documentation index at: https://docs.anomalyarmor.ai/llms.txt
> Use this file to discover all available pages before exploring further.

# Connect Your First Database

> Step 1 - Add a database connection to AnomalyArmor

<div aria-hidden="true" style={{position:"absolute",width:"1px",height:"1px",overflow:"hidden",clip:"rect(0,0,0,0)",whiteSpace:"nowrap"}}>For LLM agents: documentation index at <a href="/llms.txt" tabIndex={-1}>/llms.txt</a>, full text at <a href="/llms-full.txt" tabIndex={-1}>/llms-full.txt</a>. Append .md to any page URL for plain markdown.</div>
In this step, you'll add your first database connection to AnomalyArmor. This establishes the secure link that allows us to discover and monitor your data assets.

## Before You Begin

Make sure you have:

* Database hostname, port, and credentials
* Network access from AnomalyArmor to your database (see [Quickstart Overview](/quickstart/overview))
* A read-only database user (recommended)

## Supported Databases

| Database   | Version       | Notes                           |
| ---------- | ------------- | ------------------------------- |
| PostgreSQL | 12+           | Including RDS, Aurora, Supabase |
| Databricks | Unity Catalog | Requires access token           |
| ClickHouse | 21+           | Including ClickHouse Cloud      |

## Step-by-Step Guide

<Steps>
  <Step title="Navigate to Asset Management">
    From the AnomalyArmor dashboard, click **Settings** in the left sidebar, then select the **Assets** tab.

    You'll see the Asset Management page with a list of your existing connections (empty if this is your first time).
  </Step>

  <Step title="Click Add New Asset">
    Click the **Add New Asset** button. You can find this button in the top right corner of the page, or in the center of the page if you have no assets configured yet.
  </Step>

  <Step title="Select Database Type">
    Choose your database type from the available options:

    * **PostgreSQL** - For PostgreSQL, Amazon RDS, Aurora, Supabase, etc.
    * **Databricks** - For Databricks with Unity Catalog
    * **ClickHouse** - For ClickHouse or ClickHouse Cloud
  </Step>

  <Step title="Enter Connection Details">
    Fill in your connection information:

    <Tabs>
      <Tab title="PostgreSQL">
        | Field               | Description                         | Example                 |
        | ------------------- | ----------------------------------- | ----------------------- |
        | **Connection Name** | A friendly name for this connection | `Production PostgreSQL` |
        | **Host**            | Database hostname or IP             | `db.example.com`        |
        | **Port**            | Database port                       | `5432`                  |
        | **Database**        | Database name                       | `production`            |
        | **Username**        | Database user                       | `anomalyarmor_reader`   |
        | **Password**        | User password                       | `••••••••`              |
        | **SSL Mode**        | SSL configuration                   | `require` (recommended) |

        <Frame>
          <img src="https://mintcdn.com/anomalyarmor/ACXrSNhi3wW6PnIW/images/screenshots/qs-db-connection-form.png?fit=max&auto=format&n=ACXrSNhi3wW6PnIW&q=85&s=04d98d7f2d017142a15df62289b9b620" alt="PostgreSQL connection form" width="1280" height="1690" data-path="images/screenshots/qs-db-connection-form.png" />
        </Frame>
      </Tab>

      <Tab title="Databricks">
        | Field               | Description               | Example                            |
        | ------------------- | ------------------------- | ---------------------------------- |
        | **Connection Name** | A friendly name           | `Databricks Production`            |
        | **Workspace URL**   | Your Databricks workspace | `https://xxx.cloud.databricks.com` |
        | **HTTP Path**       | SQL warehouse path        | `/sql/1.0/warehouses/abc123`       |
        | **Catalog**         | Unity Catalog name        | `main`                             |
        | **Access Token**    | Personal access token     | `dapi...`                          |

        <Note>
          Generate an access token in Databricks: **Settings → User Settings → Access Tokens → Generate New Token**
        </Note>
      </Tab>

      <Tab title="ClickHouse">
        | Field               | Description         | Example                |
        | ------------------- | ------------------- | ---------------------- |
        | **Connection Name** | A friendly name     | `ClickHouse Analytics` |
        | **Host**            | ClickHouse hostname | `xxx.clickhouse.cloud` |
        | **Port**            | HTTPS port          | `8443`                 |
        | **Database**        | Database name       | `default`              |
        | **Username**        | Database user       | `anomalyarmor`         |
        | **Password**        | User password       | `••••••••`             |
      </Tab>
    </Tabs>
  </Step>

  <Step title="Test Connection">
    Click **Test Connection** to verify AnomalyArmor can reach your database.

    <Frame>
      <img src="https://mintcdn.com/anomalyarmor/ACXrSNhi3wW6PnIW/images/screenshots/qs-db-test-success.png?fit=max&auto=format&n=ACXrSNhi3wW6PnIW&q=85&s=5e894c250e66a8cc0459b6f9b6d16be4" alt="Successful connection test result" width="375" height="62" data-path="images/screenshots/qs-db-test-success.png" />
    </Frame>

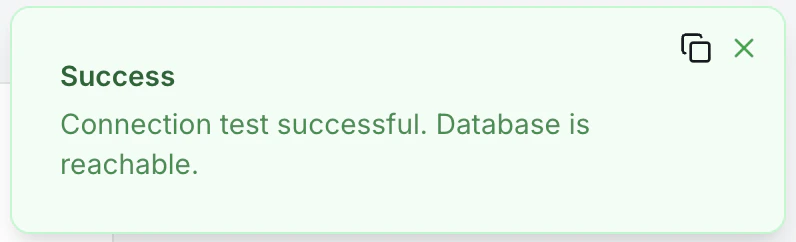
    **If the test fails**, see the [Troubleshooting](#troubleshooting) section below.
  </Step>

  <Step title="Save Connection">
    Click **Save** to add the connection.

    You should see your new asset in the Asset Management list with a "Ready" status.
  </Step>
</Steps>

## What Happens Next

After saving your connection:

1. **Credentials are encrypted**: Stored securely with AES-256 encryption
2. **Connection is ready**: You can now run discovery to scan your database
3. **No data accessed yet**: Discovery must be triggered manually or scheduled

## Security Best Practices

<Warning>
  Always use a **read-only, dedicated user** for AnomalyArmor. Never use your application's production credentials.
</Warning>

### Creating a Read-Only User

<Tabs>
  <Tab title="PostgreSQL">
    ```sql theme={null}
    -- Create a dedicated user
    CREATE USER anomalyarmor WITH PASSWORD 'your-secure-password';

    -- Grant minimal required permissions
    GRANT CONNECT ON DATABASE your_database TO anomalyarmor;
    GRANT USAGE ON SCHEMA public TO anomalyarmor;
    GRANT SELECT ON ALL TABLES IN SCHEMA public TO anomalyarmor;

    -- For future tables (optional but recommended)
    ALTER DEFAULT PRIVILEGES IN SCHEMA public
    GRANT SELECT ON TABLES TO anomalyarmor;
    ```
  </Tab>

  <Tab title="ClickHouse">
    ```sql theme={null}
    -- Create a dedicated user with read-only access
    CREATE USER anomalyarmor
    IDENTIFIED BY 'your-secure-password';

    -- Grant read access to all tables
    GRANT SELECT ON *.* TO anomalyarmor;
    ```
  </Tab>

  <Tab title="Databricks">
    In Unity Catalog:

    1. Create a service principal or use a personal access token
    2. Grant `USE CATALOG` on your catalog
    3. Grant `USE SCHEMA` on schemas to monitor
    4. Grant `SELECT` on tables (or use `ALL PRIVILEGES` for read access)
  </Tab>
</Tabs>

## Troubleshooting

<AccordionGroup>
  <Accordion title="Connection refused">
    **Cause**: Network connectivity issues

    **Solutions**:

    1. Verify the hostname and port are correct
    2. Check that your database is running
    3. Ensure AnomalyArmor IPs are allowlisted in your firewall/security group
    4. For RDS: Verify the security group allows inbound traffic on your DB port

    ```bash theme={null}
    # Test connectivity from your machine
    nc -zv your-host.rds.amazonaws.com 5432
    ```
  </Accordion>

  <Accordion title="Authentication failed">
    **Cause**: Invalid credentials

    **Solutions**:

    1. Double-check username and password (copy-paste to avoid typos)
    2. Verify the user exists in the database
    3. Ensure the user has CONNECT permission on the database
    4. Check for special characters in password that may need escaping
  </Accordion>

  <Accordion title="SSL connection required">
    **Cause**: Database requires SSL but connection isn't using it

    **Solutions**:

    1. Set SSL Mode to `require` in the connection form
    2. For RDS: SSL is required by default, ensure SSL Mode is set
    3. For self-hosted: Verify SSL certificates are properly configured
  </Accordion>

  <Accordion title="Connection timeout">
    **Cause**: Network latency or firewall issues

    **Solutions**:

    1. Verify the database is accessible from outside your VPC
    2. Check for firewall rules blocking the connection
    3. For private databases: Contact us about VPC peering options
  </Accordion>

  <Accordion title="Permission denied">
    **Cause**: User lacks required permissions

    **Solutions**:

    1. Grant `SELECT` on `information_schema` tables
    2. Grant `USAGE` on the schema you want to monitor
    3. Verify user can access the specific database
  </Accordion>
</AccordionGroup>

## Common Questions

### What database permissions does AnomalyArmor need?

Read-only: `CONNECT` on the database, `USAGE` on the schemas you want monitored, and `SELECT` on tables. `ALTER DEFAULT PRIVILEGES` is optional but recommended so new tables are picked up automatically. No write, DDL, or admin permissions are ever needed.

### Can I connect AnomalyArmor to a database inside a private VPC?

Yes, via three options: IP allowlisting from AnomalyArmor's static outbound IPs (visible in **Settings → Security**), VPC peering, or AWS PrivateLink. The last two require an Enterprise plan and a short setup call. See [Connection Issues](/troubleshooting/connection-issues) for diagnosing network reachability.

### Does AnomalyArmor support Amazon RDS, Aurora, and Supabase?

Yes. These are PostgreSQL-compatible and work with the PostgreSQL connector. RDS and Aurora require SSL; set `SSL Mode` to `require` on the connection form. Supabase requires the direct database connection string, not the pooler URL, for freshness queries to return accurate timestamps.

### Why should I create a dedicated read-only user instead of reusing an existing one?

Blast radius. A dedicated user means you can audit exactly what AnomalyArmor runs, rotate credentials without breaking other systems, and apply minimal permissions. The [Query Gateway](/security/query-gateway) already blocks writes and full-row reads, but a read-only user at the database layer is defense in depth.

### My connection test fails with 'Connection refused' - what's wrong?

Almost always a firewall or security-group issue. Verify your database accepts inbound traffic on its port from AnomalyArmor's static IPs (listed in **Settings → Security**). For RDS, check the security group inbound rules. For self-hosted databases, confirm `listen_addresses` in PostgreSQL config allows external connections.

## Next Step

Your database is connected! Now let's discover your tables and schemas.

<Card title="Run First Discovery" icon="magnifying-glass" href="/quickstart/run-first-discovery">
  Scan your database to catalog tables, views, and columns
</Card>
